Grow-light packaging often emphasizes color, watt equivalents, or impressive-sounding labels without showing what reaches the leaves. This guide turns the plant, window, fixture, and available mounting space into a practical starting setup you can refine.
Decide whether you need a light before shopping
Judge the plant and its growing position together. A pothos maintaining compact new growth beside an unobstructed east window may not need the same intervention as a succulent stretching across a dim room. Window direction is only a starting clue: trees, neighboring buildings, curtains, seasonal sun angles, and distance from the glass can substantially change what reaches the leaves.
| Situation | Starting route | What the fixture must do |
|---|---|---|
| Compact foliage plant already growing normally near a window | No new light, or seasonal supplementation | Maintain growth during darker months without sharply changing exposure |
| Low- or medium-light foliage plant in a dim position | Supplemental or primary light | Cover the whole canopy at moderate intensity |
| Succulent, cactus, herb, citrus, or flowering plant | Stronger supplemental or primary light | Deliver higher usable intensity rather than merely extending a dim day |
| Several plants on a shelf | Bar or panel fixture | Provide even edge-to-edge coverage at a workable mounting height |
| One small plant or a narrow corner | Bulb or compact fixture | Concentrate light on the plant without missing half the canopy |
Measure the group’s width, the distance available above it, and the height difference between plants before choosing a fixture. If you want a calculated starting layout, enter those details in the plant setup planner.
Read the specifications that affect plants
PPFD, or photosynthetic photon flux density, describes plant-usable photons arriving at a surface each second. A PPFD map is most useful when it shows several points across the advertised footprint at a stated mounting height. One high center reading does not reveal whether plants near the edges receive similar exposure.
- Prioritize: a PPFD map, tested hanging height, coverage dimensions, actual power draw, fixture dimensions, dimming control, and heat-management instructions.
- Use PPF for context: photosynthetic photon flux describes total plant-usable light leaving a fixture, but it does not show how evenly that output reaches your particular shelf or canopy.
- Treat watts as an operating figure: wattage indicates electrical consumption, not the intensity arriving at a leaf. Efficiency and fixture design can make equal-wattage lights perform differently.
- Treat lumens cautiously: they describe brightness weighted for human vision. They can help compare similar white lamps, but they are not a direct measurement of plant-usable light.
- Do not select by Kelvin alone: color temperature describes the visual appearance of white light, not its intensity, footprint, or daily delivery.
White or balanced-spectrum LEDs are practical for most houseplants and living spaces. A household LED bulb may contribute useful light when positioned appropriately, but without plant-light output or coverage data, its ability to support a demanding plant is difficult to predict. The words full spectrum also do not establish that a fixture is strong enough.
Position the fixture for coverage, not one bright spot
Place the light above the leaves when possible. Light coming mainly from one side encourages plants to lean, while a fixture centered over the canopy generally produces more even growth. For a tall plant, overhead light may leave lower foliage shaded; a vertical side light can improve coverage without forcing the top leaves too close to the fixture.
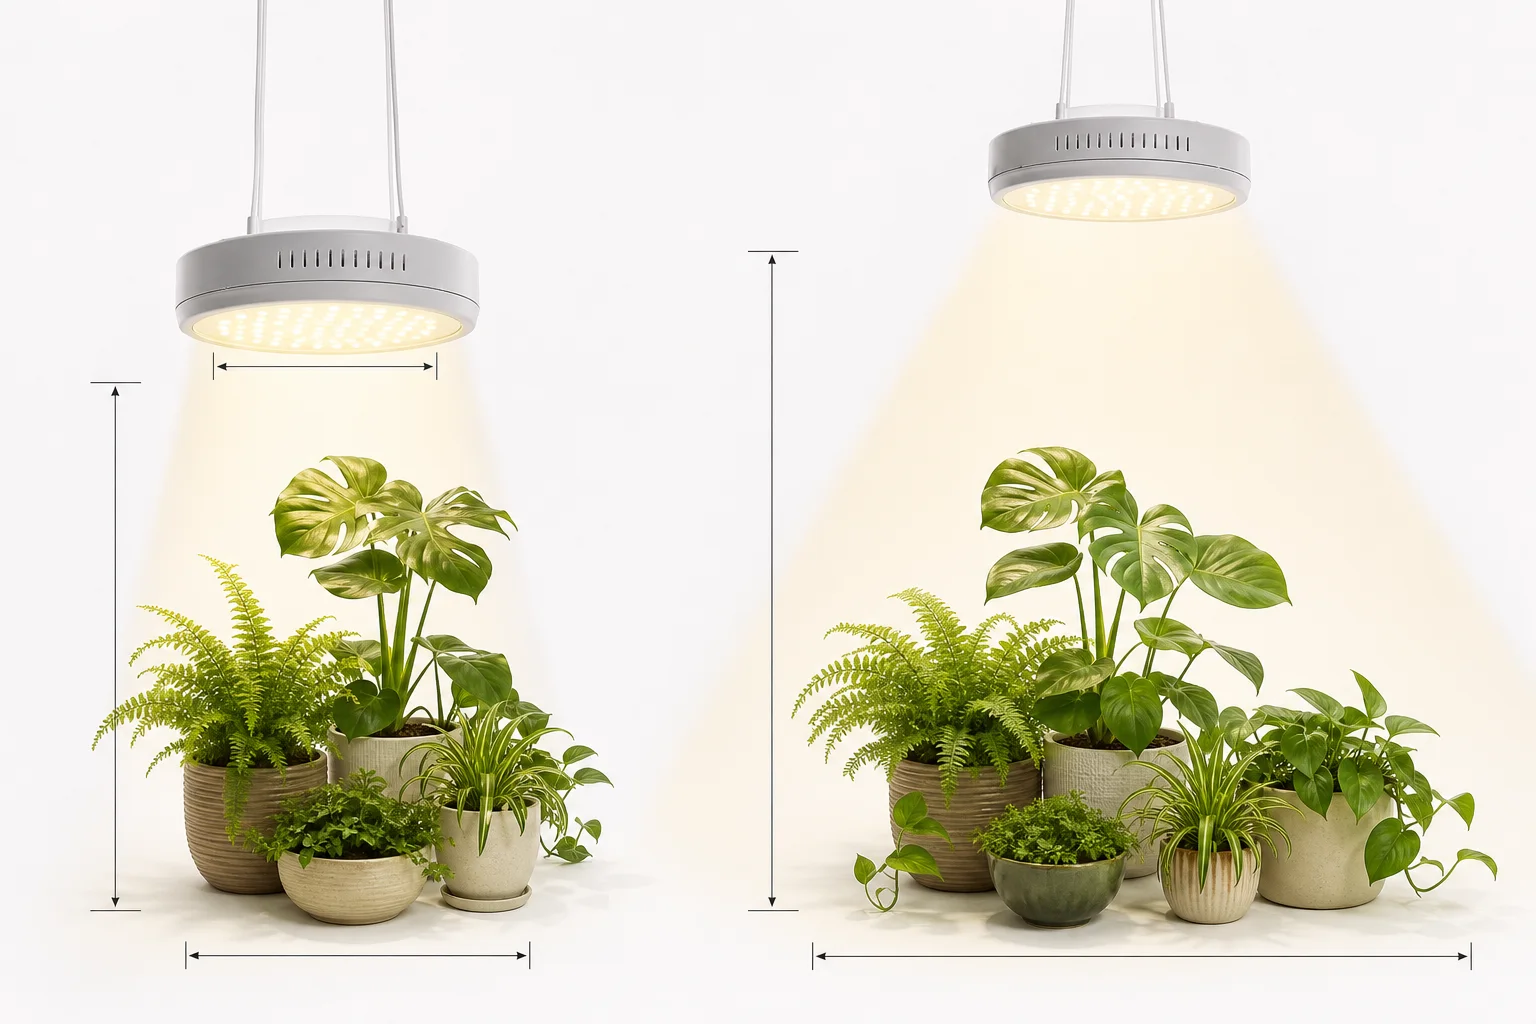
Distance changes both intensity and footprint. Moving a light closer usually raises intensity but narrows the useful area and can create a bright center. Raising it generally spreads light over more plants while reducing what reaches each leaf. Because optics and fixture shapes differ, package guidance such as “covers four square feet” is meaningful only when paired with a mounting height and an intensity map.
- Arrange plants with similar light needs together.
- Raise shorter pots on stable stands so their leaves sit closer to one canopy level.
- Center the fixture over the foliage rather than over the shelf or table.
- Begin at the maker’s documented height, using the more conservative end for newly exposed plants.
- Check the outer leaves as carefully as the center plant; edge performance often limits the usable footprint.
Install the light and choose an initial schedule
Mount the fixture securely, keep electrical connections away from watering runoff, and follow its clearance and ventilation instructions. At leaf level, check for uncomfortable radiant heat after the lamp has operated for several hours. LEDs usually produce less radiant heat than older lamp types, but the fixture and driver can still warm the growing area.
For a light supplementing a useful window, begin with roughly 10–12 lamp hours centered on daytime so natural and artificial light overlap. For foliage plants relying mainly on the fixture, 12–14 hours is a practical initial range. Flowering plants and other higher-light subjects may use 14–16 hours when intensity is appropriate, but a longer timer cannot fully compensate for a weak fixture.
Most houseplants should receive darkness each day; avoid exceeding 16 total hours of light unless reliable species-specific guidance says otherwise. Poinsettias, kalanchoes, chrysanthemums, and holiday cacti can have flowering responses tied to uninterrupted darkness, so their schedules require more care than a general foliage setup.
- Place the plants and record the fixture-to-canopy distance.
- Set a plug timer rather than switching the lamp manually.
- Start at a moderate output if the fixture is dimmable.
- Photograph the plant from the same angle and mark the setup date.
- Change only one major variable—height, output, or duration—at a time.
Tell low light, normal growth, and excess exposure apart
Judge the setup from combinations of evidence and, especially, the new growth produced under it. One yellow leaf does not diagnose a lighting problem. Watering stress, root damage, temperature changes, pests, and normal leaf aging can produce overlapping symptoms.
More light may be needed
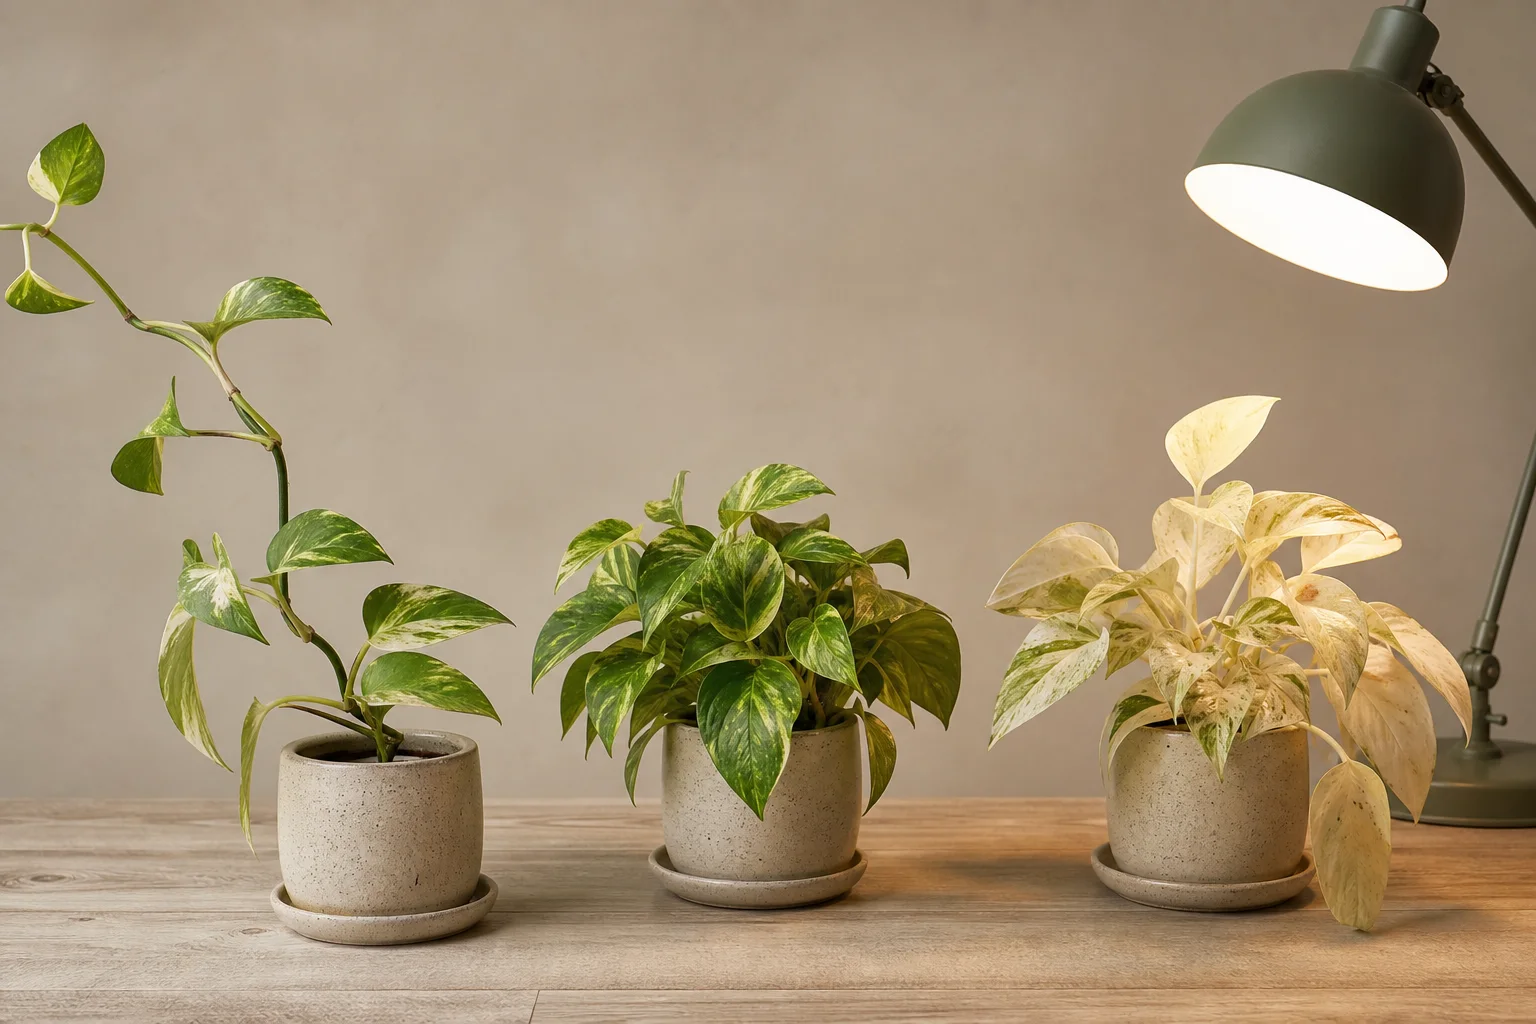
New stems lengthen with wider spaces between leaves, growth leans toward the fixture, or new foliage is smaller and paler than expected. Flowering may decline, and variegated plants may produce greener growth. If these changes are strongest at the footprint’s edges or on lower leaves, uneven coverage is more likely than an inadequate timer for the entire group.
The starting setup is probably workable
New growth remains proportionate to the species, stems are reasonably compact, and leaf color looks normal without widespread bleaching. Plants do not need to grow quickly to confirm a useful setup; snake plants, ZZ plants, and other naturally slow species may show progress gradually.
Exposure may be too intense or too abrupt
Pale or bleached areas develop on the light-facing surfaces, leaves show dry patches, or stress is concentrated directly beneath the fixture. Heat can intensify damage, but cool-running LEDs can still deliver excessive light at close range. Recent relocation from a dim room increases the likelihood of acclimation stress.
The footprint may be uneven
The center plant stays compact while edge plants stretch inward, or one side of a broad canopy repeatedly leans toward the fixture. Recenter the light, reduce the group’s width, add a second fixture, or use side lighting. Rotating pots can balance appearance, but it does not replace adequate coverage.
Use a four-week adjustment plan
Day 0: Record the baseline
Write down the fixture height, timer hours, dimmer setting, window direction, and approximate distance from the glass. Photograph the entire canopy and one active growing point. This record prevents small setup changes from becoming guesswork.
Days 3–7: Check heat and rapid stress
Inspect the light-facing leaves and confirm that the fixture, cord, timer, and mounting hardware remain secure. If rapid bleaching or dry patches appear, reduce output or increase distance. Otherwise, keep the settings stable; normal growth responses often need longer than a few days to assess.
Weeks 2–4: Evaluate new growth
Compare the newest leaves, shoots, and stem spacing with the baseline. If growth remains weak, first improve coverage or intensity in a small increment. Change timer length only when the current daily exposure is short and the plant still receives a suitable dark period.
Monthly and seasonally: Recheck the whole space
Raise the fixture as plants grow, clean dust from lamps and leaves, and reconsider the window contribution as seasons change. A setup that supplements weak winter daylight may be unnecessarily strong beside the same window in summer. Adjust irrigation by checking the substrate because brighter conditions can increase water use.
Avoid fixes that hide the real limitation
- Do not extend a very dim lamp indefinitely. Duration and intensity work together, and most plants still benefit from a consistent dark period.
- Do not copy another grower’s distance without checking the fixture. A focused bulb, diffused bar, and powerful panel can deliver very different exposure from the same height.
- Do not crowd unrelated plants together. A fern and a desert cactus are unlikely to share one ideal intensity when their leaves sit at the same level.
- Do not make several adjustments at once. Changing height, output, timer length, watering, and fertilizer together makes the plant’s response difficult to interpret.
- Do not fertilize to correct stretching. Added nutrients do not replace light and can contribute to weak growth or salt buildup when the plant is growing slowly.
- Do not expect damaged tissue to reset. Success is better judged by stable new growth, normal coloration, and more even growth across the illuminated area.
A workable setup fits the plant and the room: it covers the canopy, can be mounted at a documented height, runs on a consistent timer, and leaves room for adjustment. If those conditions cannot be met, a different fixture shape or a brighter natural position may be more useful than a higher marketing specification.
Build a Grow-Light Setup for Your Plant and Room
Enter the plant type, window contribution, canopy size, fixture style, and available mounting height to create a practical starting layout. The planner can organize placement and timer choices before you change the setup and begin monitoring new growth.
Build My Grow-Light SetupFrequently Asked Questions
Can a phone light-meter app help with grow-light placement?
A phone app can be useful for comparing brighter and darker positions under the same white fixture, but it may not provide accurate PPFD without suitable calibration or a sensor. Use it to find relative differences across the canopy rather than treating its reading as laboratory-grade plant-light data.
Can one grow light cover plants of very different heights?
It can be difficult because the tallest leaves receive more light and may shade shorter plants. Raise small pots on stable stands, arrange plants by height, or add vertical side lighting. If the height difference is large, separate fixtures usually provide more controllable coverage.
Is it okay to run a grow light at night?
The lamp can run during evening hours if the schedule is consistent and the plant still receives sufficient uninterrupted darkness. Daytime operation is often easier in rooms where the fixture supplements a window, and it may make bright household lighting less disruptive to sleep.
Should I water more often after adding a grow light?
Possibly, because increased light can support more growth and faster moisture use. Do not change to a fixed shorter watering interval immediately. Check substrate moisture, pot weight, and plant response, then adjust watering only if the container begins drying more quickly.
Will a bleached or scorched leaf turn green again?
Severely damaged areas generally do not regain their former color. Correct the exposure and judge improvement from undamaged new growth. Remove an affected leaf only when it is extensively damaged, declining, or creating a sanitation issue; partly green tissue can still contribute to the plant.
Do holiday cacti and poinsettias need a different timer schedule?
Yes, when flowering is the goal. These plants respond to day length and may require long, uninterrupted nights for bud development. Room lamps or grow lights during the dark period can interfere, so follow a species-specific flowering schedule rather than the general timer ranges for foliage plants.
Sources & Further Reading
- Lighting for indoor plants and starting seeds University of Minnesota Extension
- Lighting for Indoor Plants University of Maryland Extension
- How to Set Up Supplemental Lights for Indoor Plants Iowa State University Extension and Outreach
- Important Considerations for Providing Supplemental Light to Indoor Plants Iowa State University Extension and Outreach
- Measuring Daily Light Integral in a Greenhouse Purdue University Extension