To get rid of thrips on houseplants, first confirm the characteristic combination of silvery scarring, dark frass spots, and distorted young growth. Isolate the plant, inspect every nearby plant, remove as many insects as possible, and then apply a product whose label specifically permits indoor houseplant use against thrips. Because eggs and nonfeeding stages may escape the first application, plan on repeated inspections and any permitted reapplications at the label interval.
1. Confirm Thrips Before You Treat
Thrips are slender, fast-moving insects that may look like tiny tan, yellow, brown, or black splinters. Their bodies can be difficult to see without magnification, so diagnose the pattern of damage as well as the insect.
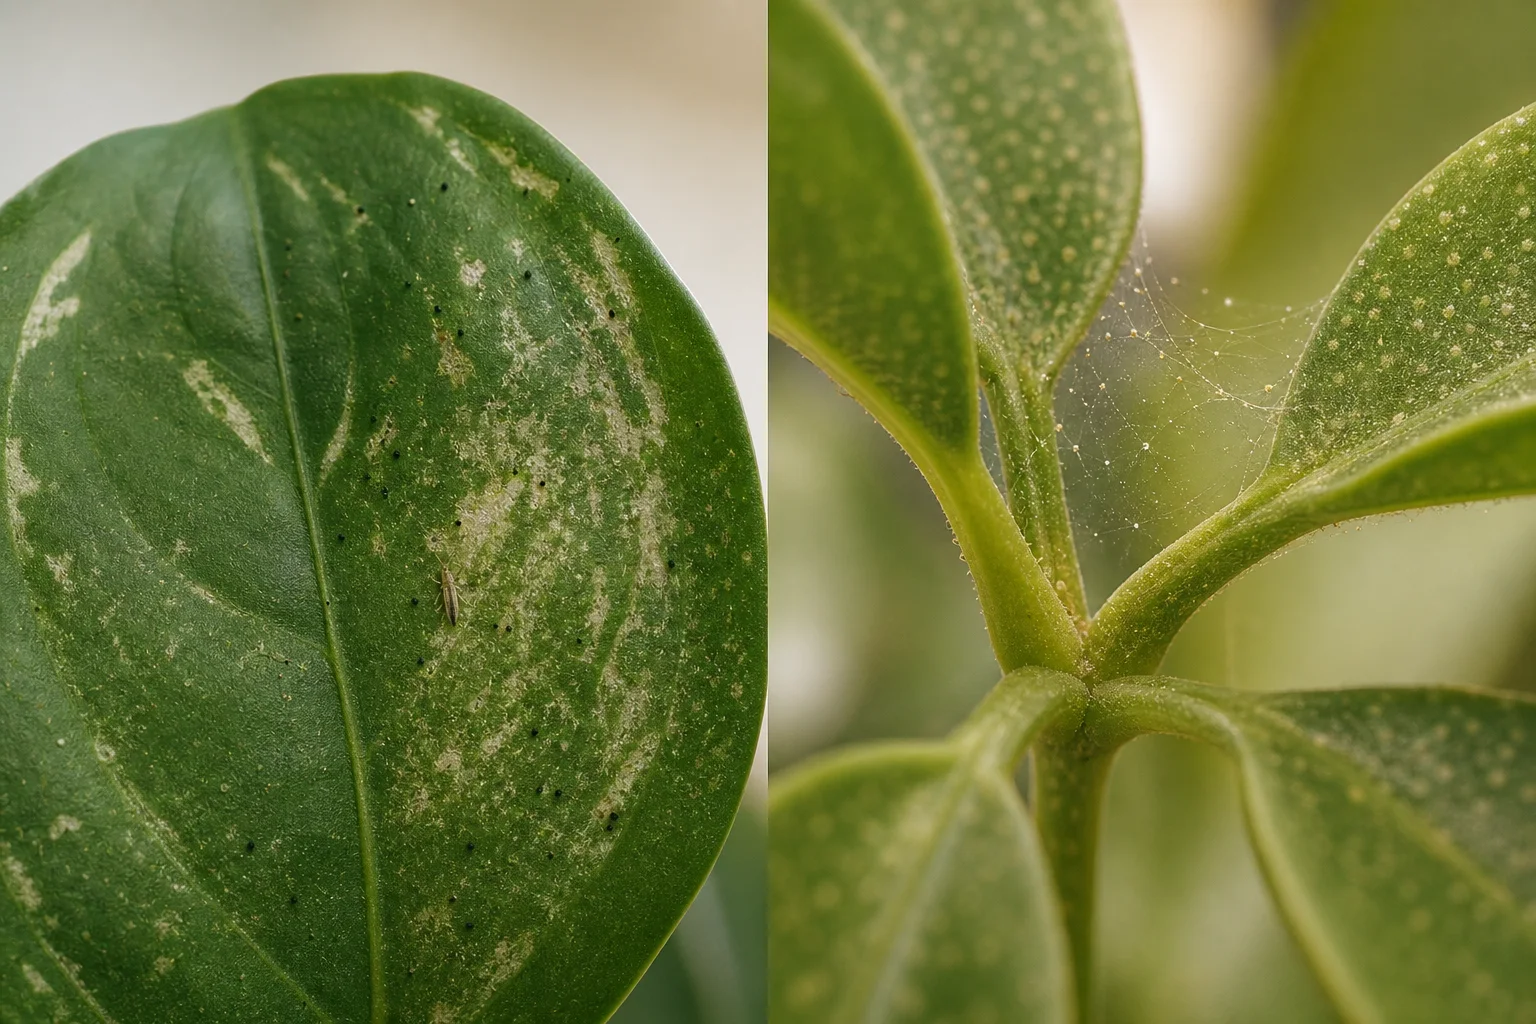
Look for three clues together
- Silvery or pale scars: Feeding removes the contents of surface cells, creating irregular streaks, patches, or sunken scars.
- Black or dark frass: Pinpoint deposits often appear within or beside damaged tissue.
- Distorted new growth: Leaves fed on while folded may emerge curled, puckered, stunted, or scarred. Flowers may develop streaks or misshapen petals.
Inspect the places thrips tend to hide
Use a bright light and magnifier to check leaf undersides, the bases of petioles, flowers, buds, growing tips, curled leaves, and leaves that are still unfurling. Tap a flower or damaged leaf over white paper; moving, narrow specks support a thrips diagnosis.
Thrips versus spider mites
Spider mites usually produce fine, widespread stippling and may leave delicate webbing around leaf joints or undersides. Thrips damage tends to form larger irregular silver scars with dark frass and no mite webbing. Abrasion, sun injury, and mineral residue can also look pale, but they do not produce moving insects or fresh frass.
If the evidence is mixed, photograph the damaged surface, leaf underside, and newest growth before choosing a treatment.
2. Understand Why One Treatment Often Falls Short
Thrips pass through egg, two feeding larval stages, nonfeeding prepupal and pupal stages, and adulthood. Their locations vary by species: eggs may be inserted into plant tissue, feeding larvae and adults may shelter in buds or folded leaves, and prepupae or pupae may occur in potting media, leaf litter, crevices, or protected plant tissue.
A contact spray reaches only the insects it touches. It may miss eggs inside leaves, insects concealed in new growth, and nonfeeding stages away from exposed foliage. Those survivors can later emerge and make the infestation appear to return.
This is why the plan combines several actions:
- Quarantine to limit movement between plants.
- Mechanical removal to reduce the starting population.
- Thorough, label-directed coverage of exposed hiding places.
- Repeated inspection and reapplication when permitted by the product label.
- Monitoring of nearby plants so they do not reseed the infestation.
Repotting may remove some stages in the growing medium, but it does not address thrips living in leaves, flowers, or crevices. It is not a substitute for treating the whole infestation.
3. Gather Supplies and Set Up a Quarantine Area
Useful materials
- A magnifier and bright flashlight
- White paper for tap tests
- Clean pruners and a sealable waste bag
- A sink, shower, or damp disposable towels for plain-water cleaning
- Yellow or blue sticky cards for monitoring flying adults
- An indoor-labeled pesticide, if mechanical control is not sufficient
- Any gloves, eye protection, or other equipment required by the label
Move the affected plant away from the collection, preferably to a separate room with suitable light. Bag or loosely wrap the canopy while transporting it through the home to reduce the chance of dislodging insects. Avoid letting its leaves touch other plants.
Inspect every plant that shared the shelf, window, cabinet, or watering area. Pay particular attention to flowering plants and species with tightly folded new leaves. Monitoring cards can reveal flying adults, but cards alone are unlikely to control an established population.
Before purchasing a pesticide, read the complete label. It should list the intended site, such as indoor houseplants or indoor ornamentals, and the target pest, such as thrips or exposed thrips. An active-ingredient name by itself does not establish that a particular formulation can be used indoors.
4. Complete the Day-Zero Knockdown and Treatment
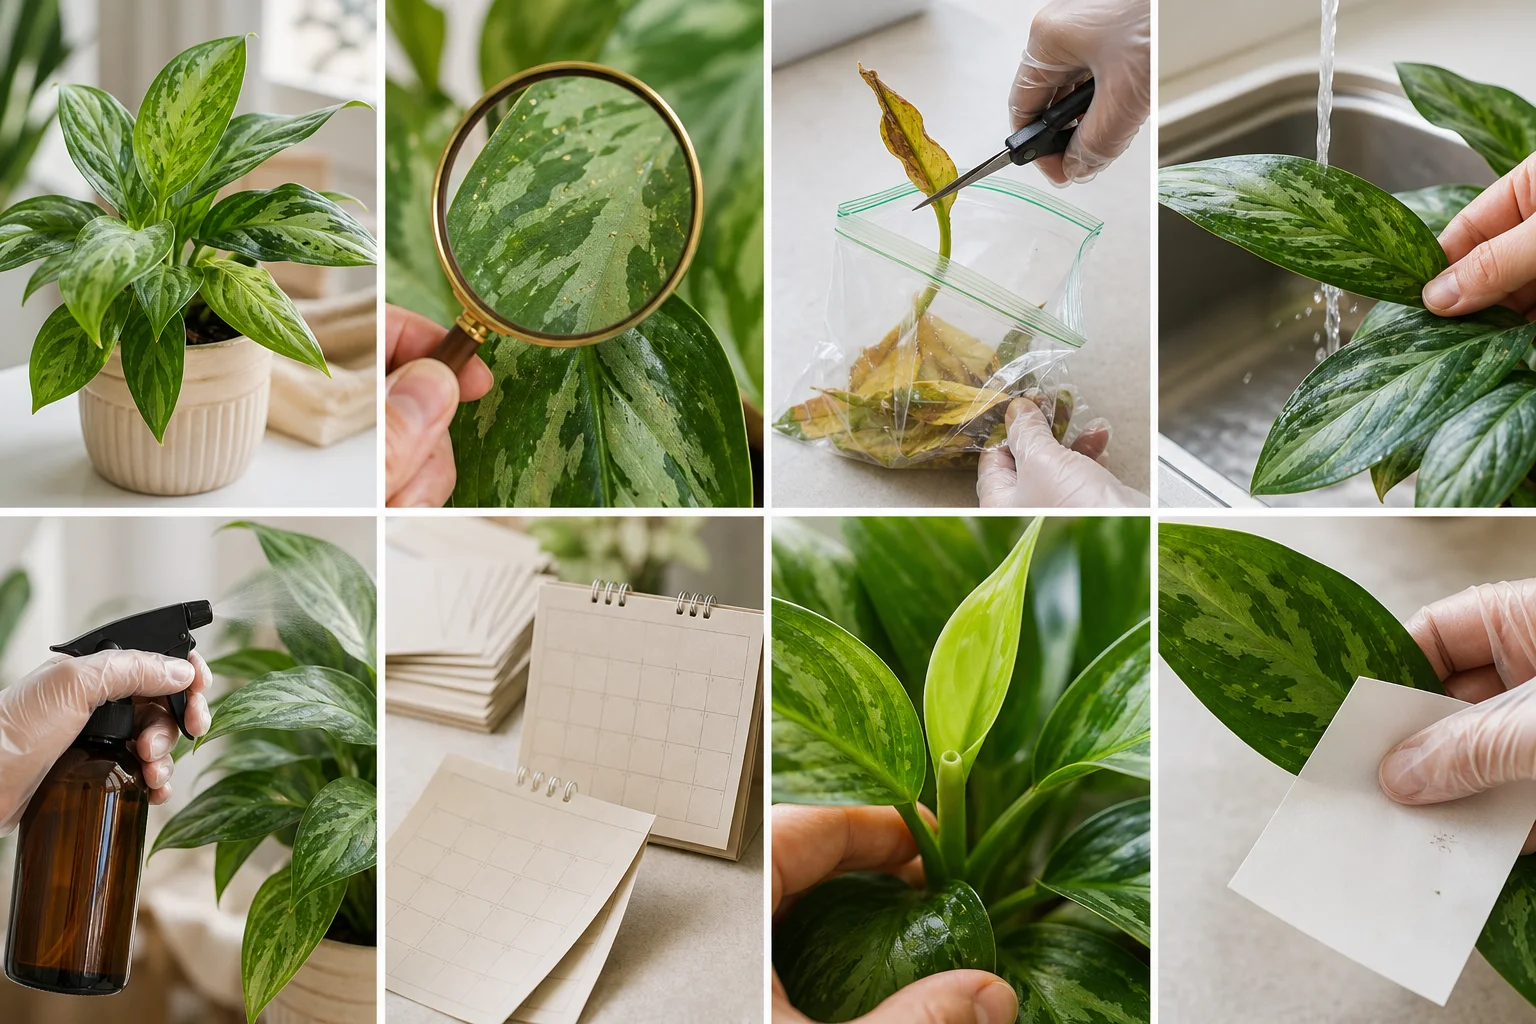
- Record the starting condition. Photograph the newest leaf, the most damaged leaf, and any visible insects or frass. These images provide a baseline for the two-week check.
- Remove major hiding sites. Clip heavily infested flowers, buds, and badly distorted leaves if the plant can tolerate the loss. Seal this material before carrying it through the home. Do not strip a stressed plant of most of its foliage.
- Wash the plant. Use plain water to rinse both leaf surfaces, petioles, stems, growing points, and accessible crevices. Support tender leaves and use moderate pressure. Wipe broad leaves with a damp disposable towel, changing towels frequently.
- Clean the immediate area. Remove fallen flowers and leaf debris. Wipe the shelf, cachepot, saucer, and nearby hard surfaces so dislodged insects are less likely to return to the plant.
- Apply a suitable labeled product if needed. Products registered for some indoor houseplant uses may contain ingredients such as potassium salts of fatty acids, horticultural or mineral oils, pyrethrins, or neem-derived materials. The exact product label must permit the plant, indoor site, and thrips treatment. Cover the locations specified by the label rather than spraying only the visible damage.
- Observe plant-sensitivity directions. Oils, soaps, and other sprays can mark or burn sensitive foliage under some conditions. Follow any label instructions for testing a small area and waiting for signs of injury before broader treatment.
- Protect people, pets, and non-target organisms. Follow ventilation, protective-equipment, drying, reentry, storage, and disposal directions. Keep children and pets away for the period stated on the label, and protect aquariums from spray or drift as directed.
Do not improvise a household-detergent dilution, combine pesticide products, or increase the application rate. More spray can increase plant injury and exposure without resolving concealed life stages.
For flowering plants, read the pollinator advisory and bloom restrictions carefully, especially if the plant may be moved outdoors. Do not assume that removing open flowers overrides restrictions printed on the label.
5. Follow a Label-Led Repeat-Treatment Calendar
Write the product's permitted reapplication interval and maximum number of treatments on a calendar before the first application. Labels differ by formulation, so a universal spray interval is not appropriate.
Between applications
- Keep the plant quarantined and prevent leaf contact with other plants.
- Inspect new growth, flowers, leaf undersides, and sticky cards every few days.
- Remove visible insects with plain-water washing or wiping when practical.
- Remove newly infested flowers or severely folded leaves if pruning would not overly weaken the plant.
- Water and light the plant according to its normal needs; avoid heavy fertilization that produces an abundance of soft growth.
When the label interval arrives
- Repeat the white-paper tap test and close inspection.
- Note whether you see live larvae, adults, fresh frass, or expanding silver scars.
- Reapply only if the label permits and the treatment remains appropriate.
- Target the label-listed surfaces and hiding places with careful coverage.
- Continue to observe the maximum application limit and all precautions.
Do not apply the product sooner or more frequently than its label allows. If the chosen treatment is causing leaf damage, stop and review the label, plant restrictions, and growing conditions before considering another application. Avoid mixing or rapidly alternating products unless their labels permit the intended use and a qualified source has confirmed compatibility.
6. Run the Two-Week Thrips Check
Two weeks after the first treatment, compare the plant with your baseline photographs. Old silver scars and deformed leaves do not repair themselves, so judge progress by insects, fresh deposits, and growth produced after treatment.
Check these four indicators
- Live insects: Tap several leaves and flowers over white paper and inspect with magnification.
- Fresh frass: Look for new dark specks around the newest feeding areas.
- Expanding damage: Compare the edges of silver patches with the original photographs.
- New growth: Examine the youngest leaf or bud for fresh scarring, curling, or trapped insects.
No live thrips, no fresh frass, and no new damage are encouraging signs, but they do not prove that every concealed stage is gone. Keep the plant separated and continue weekly checks for several more weeks.
If you find live thrips or fresh damage, continue the label-compliant sequence if additional applications are permitted. Also reinspect neighboring plants; an untreated host may be supplying new adults.
7. Decide Whether to Continue or Discard the Plant
Continued treatment may be reasonable when the plant retains healthy foliage, the population is declining, and quarantine is practical. Recovery time varies with plant vigor, light, temperature, and the amount of tissue already damaged.
Discarding the plant may be the more practical option when:
- Thrips remain abundant after a careful, label-compliant treatment sequence.
- Most growing points, flowers, or leaves are heavily infested.
- The plant is declining and has little healthy tissue left.
- Quarantine cannot prevent exposure of a valuable collection.
- Treatment costs and risks outweigh the value of replacing the plant.
Bag the plant before moving it through the home and dispose of it according to local rules. Clean its shelf, saucer, tools, and cachepot, then inspect the remaining collection regularly.
Reduce the chance of another outbreak
- Quarantine new plants for an observation period before adding them to the collection.
- Inspect flowers, unfurling leaves, and leaf undersides when purchasing plants.
- Use monitoring cards near vulnerable plants as an early-warning tool.
- Remove spent flowers and fallen foliage that can shelter pests.
- Check plants brought indoors after spending time outside.
If unusual rings, necrotic patches, or widespread distorted growth continue after insects decline, seek help from a local Extension office or plant diagnostic laboratory. Thrips can transmit certain plant viruses, but symptoms or a photograph alone may not identify the cause.
Not Sure the Damage Is From Thrips?
Upload clear photos of the leaf surface, underside, and newest growth to compare the visible pattern with common houseplant problems. Photo Diagnosis can narrow the possibilities, but close inspection for live insects and frass is still important.
Diagnose My PlantFrequently Asked Questions
How often should I treat houseplants for thrips?
Use the interval printed on the specific product label. Contact products often require repeat applications because they affect only exposed insects, but permitted timing and maximum application numbers vary. Do not shorten the interval or exceed the label limit.
Can neem oil help with thrips indoors?
Some neem-derived products are labeled for indoor houseplants and thrips, while others are not. Check the intended site, pest list, plant restrictions, application interval, and sensitivity warnings on the complete label. Coverage and repetition may still be needed because concealed stages can escape contact.
Do thrips live in houseplant soil?
Some thrips species have prepupal or pupal stages in potting media, while others use leaves, crevices, or protected plant tissue. Feeding larvae and adults are commonly associated with foliage, flowers, and growing points. Treating or replacing the soil alone may leave insects elsewhere on the plant.
Should I treat every plant near the infested one?
Inspect and isolate every nearby plant, but do not apply a pesticide automatically when there is no evidence of the pest. Use tap tests, close inspection, and monitoring cards to identify additional hosts. If treatment is needed, confirm that the product label covers each plant and indoor use site.
How do I know whether the thrips treatment is working?
At the two-week check, look for fewer or no live insects, an absence of fresh frass, no expansion of damaged areas, and cleaner new growth. Old scars remain visible, so they are not a reliable measure of current activity. Continue monitoring because concealed stages may emerge later.
Will thrips-damaged leaves become green again?
Silver scars and distorted tissue usually remain on the affected leaf. Improvement is better judged by healthy new growth after the population declines. Remove damaged leaves gradually only when the plant has enough healthy foliage to support recovery.
Sources & Further Reading
- Thrips in Home Gardens University of Maryland Extension
- Managing Houseplant Pests Colorado State University Extension
- Thrips: Floriculture and Ornamental Nurseries University of California Statewide Integrated Pest Management Program
- Managing Insects on Indoor Plants University of Minnesota Extension
- Introduction to Pesticide Labels United States Environmental Protection Agency
- Tools and Strategies for Pollinator Protection United States Environmental Protection Agency