Yellow leaves on a spider plant can be harmless aging or an early warning that its roots, light, or watering routine need attention. The location and texture of the damage help separate these possibilities.
Choose the right route in 60 seconds
Use the branch that best matches the plant now, then confirm it in the detailed checks below:
- Soil is wet and the pot remains heavy: Stop watering, empty the saucer or cover pot, and check drainage. Inspect the roots if the mix smells stale or leaves are collapsing.
- Soil is dry and leaves look pale or limp: Water thoroughly until excess drains, then reassess the foliage over the next day.
- Only one or two old outer leaves are yellow: This may be routine leaf turnover if the center remains firm and green.
- The window-facing side is bleached or scorched: Move the plant back from strong direct sun without placing it in a dark corner.
- Leaves show fine speckles, webbing, bumps, or sticky residue: Isolate the plant and inspect both sides of every leaf for pests.
Compare the causes that look alike
Overwatering and poor drainage commonly produce expanding yellow foliage while the mix remains wet longer than expected. Leaves may feel soft rather than crisp, and the plant can wilt despite having damp soil. A sour smell, a loose crown, or dark, softened roots makes root damage more likely. Adding more water because the plant is wilting can worsen this route.
Underwatering can also cause pale or yellow foliage, but the pot is light and the mix is dry below the surface. Leaves usually lose firmness or fold before the oldest ones dry and discolor. Spider plants have fleshy, tuberous roots that store reserves, so they may tolerate a short dry spell; repeated severe drying can still sacrifice older foliage.
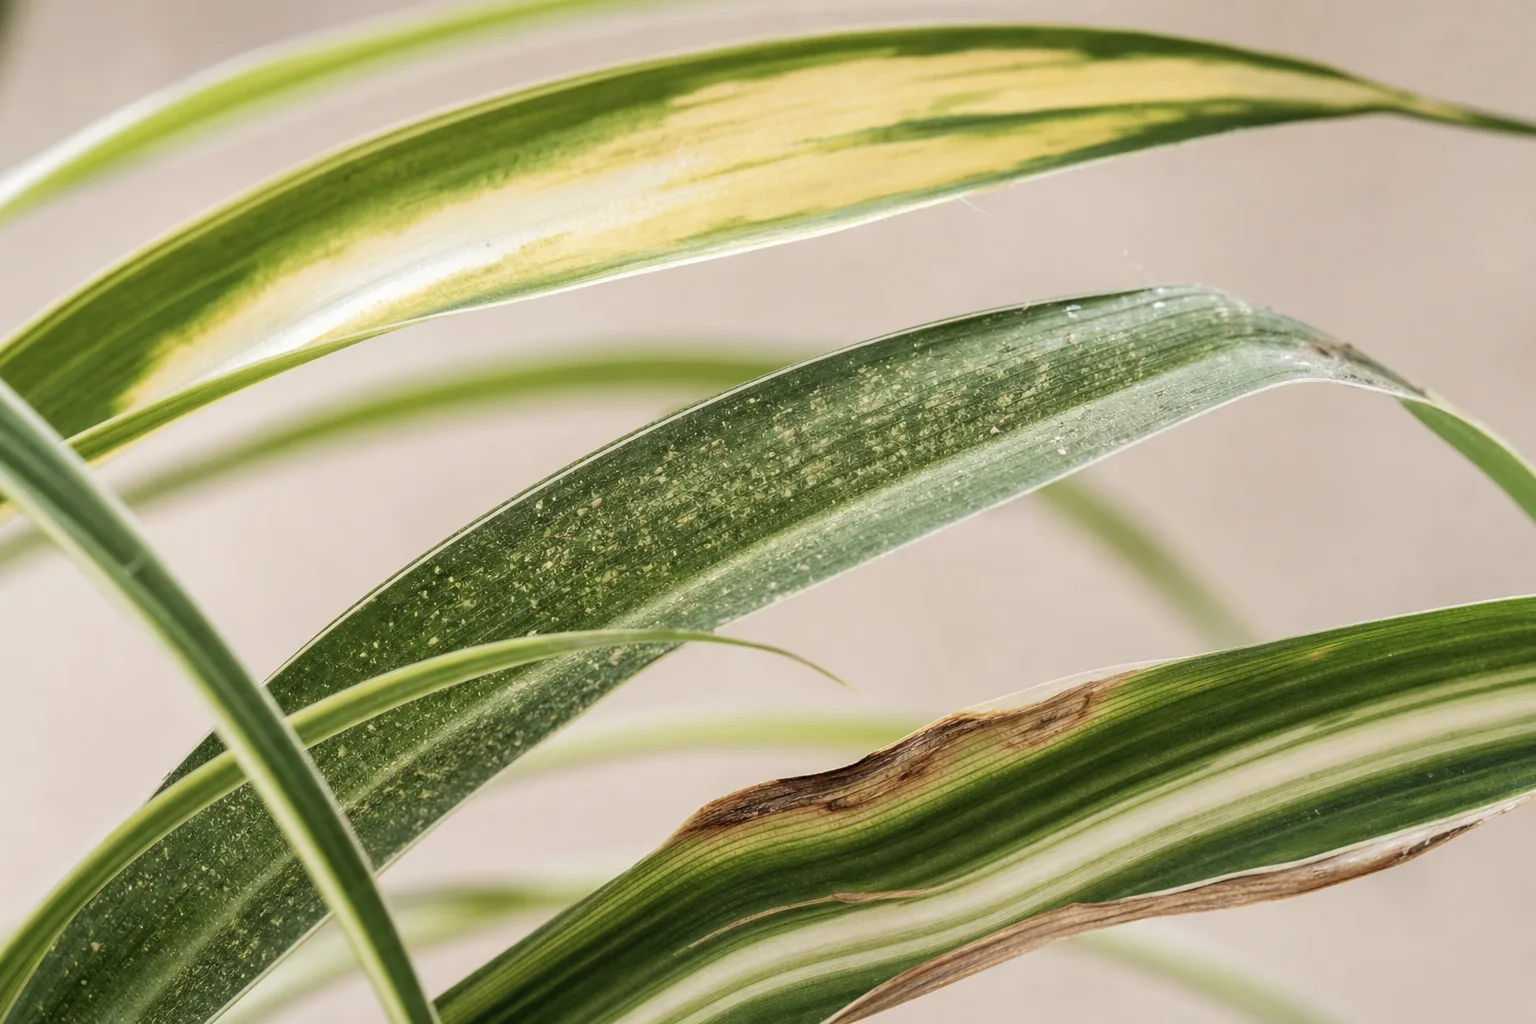
Low light tends to cause gradual paling, slower growth, and weaker variegation rather than sudden isolated patches. The potting mix may also stay wet for longer because the plant uses less water. In contrast, excessive direct sun often affects the exposed side first, creating bleached yellow areas followed by tan or brown tissue.
Nutrient shortage is possible when healthy roots have occupied old potting mix for a long time, especially if growth is weak during the brighter season. It should not be assumed from one yellow leaf. Damaged roots, low light, and excess moisture can prevent nutrient uptake, so adding fertilizer before correcting those conditions may increase soluble salts.
Pest feeding creates a different surface pattern. Spider mites cause many tiny pale or yellow dots, sometimes followed by fine webbing. Scale insects resemble attached brown bumps and may be associated with sticky honeydew. Uniform yellowing without speckling, insects, or residue is less suggestive of a pest problem.
Check the roots before changing the watering schedule
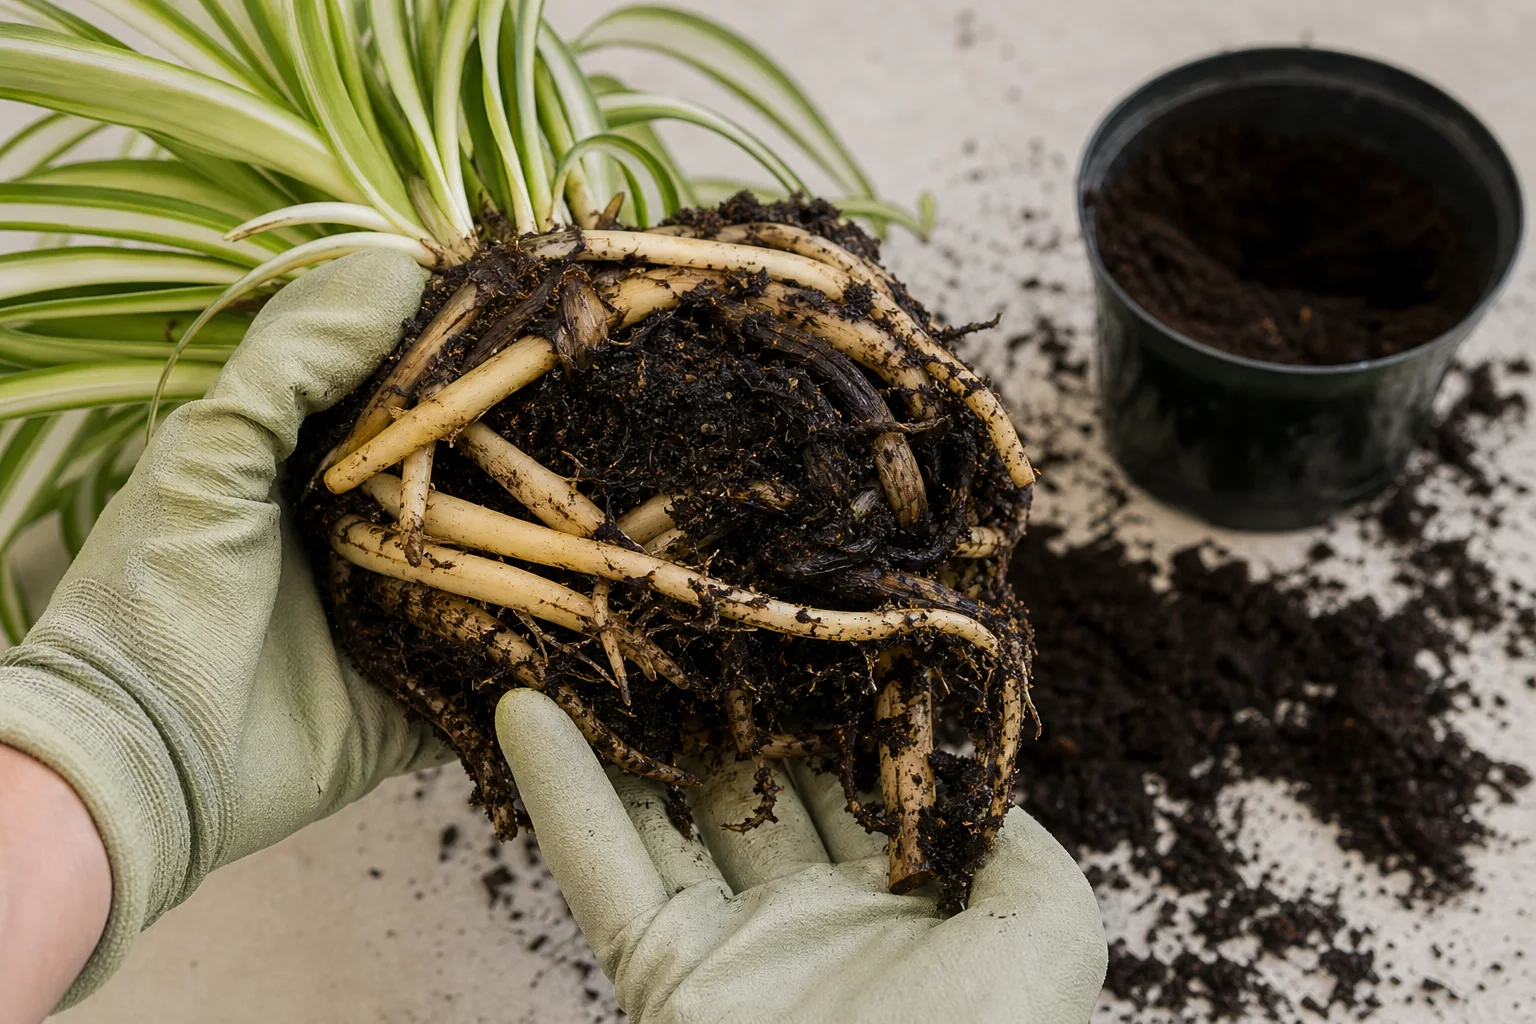
Slide the root ball out only when the soil remains persistently wet, drainage is questionable, or the plant continues declining. Healthy spider plant roots include thick storage roots and finer absorbing roots; they should feel firm and generally appear pale, cream, or light tan. Dark brown or black roots that are soft, slimy, or easy to pull apart indicate damaged tissue.
If the roots are healthy, return the plant to its container and correct the routine rather than disturbing it further. Water when the upper layer of mix has dried and the pot feels noticeably lighter, then soak the entire root ball and let it drain. Remove water collected inside a saucer or decorative cover pot.
If rot is present, remove loose wet mix and trim clearly softened roots with cleaned tools. Repot the remaining firm root system in fresh houseplant mix and a container with an open drainage hole. Choose a pot that fits the surviving roots; a much larger container leaves extra mix wet for longer. Avoid fertilizer while the plant is re-establishing.
A severely affected crown may not recover if its central tissues are soft or detached from the roots. Healthy plantlets on trailing stems can be rooted separately as a backup while the parent plant is monitored.
Correct light, mineral buildup, and pest pressure
Place the plant in bright, indirect light, such as near a filtered window or slightly back from an intense south- or west-facing exposure. Make changes gradually. Existing bleached tissue cannot repair itself, but new leaves should emerge with a more even green-and-white pattern when the light level is suitable.
Fluoride and accumulated salts are more strongly associated with brown leaf tips or margins than with whole yellow leaves. If the pot has a pale crust, fertilizer has been applied heavily, or tip damage is widespread, flush the mix thoroughly with suitable water and allow it to drain. Rainwater, distilled water, or another low-mineral source may help where local tap water repeatedly causes tip injury.
Feed only after roots are healthy and active growth is visible. Use a balanced houseplant fertilizer conservatively according to its label, reducing or pausing applications during low-light periods. Spider plants generally do not benefit from heavy feeding, and excess fertilizer can contribute to salt buildup.
For mites or scale, isolate the plant from nearby houseplants. Rinse narrow leaves carefully, wipe off visible scale where practical, and use a pesticide labeled for indoor plants and the identified pest. Follow its directions for coverage, repeat applications, ventilation, and pet precautions; eggs or hidden individuals can survive a single treatment.
A staged plan for the next month
Today
Choose the most likely route, remove standing water, and move the plant away from intense direct sun if needed. Isolate it if pests are suspected. Cut off fully yellow leaves near the base with clean scissors, but retain partly green leaves unless they are soft or diseased.
Next 3–7 days
Let moisture conditions normalize instead of watering by the calendar. Complete a root inspection if wet soil, odor, or continued collapse supports that step. Begin the appropriate labeled pest treatment if insects or mites were confirmed, and check adjacent plants for similar signs.
Next 2–4 weeks
Watch the center for firm new leaves and track whether yellowing has slowed. Adjust watering to pot weight and soil moisture as light and temperature change. Resume conservative feeding only if the roots are sound and the plant is producing new growth. Avoid repeated repotting or frequent location changes during this period.
What recovery looks like—and when to escalate
Yellow tissue generally does not become green again, so judge progress by what happens next. Encouraging signs include a firm crown, stable existing foliage, new leaves with normal color, and potting mix that dries at a predictable pace. A thirsty but otherwise healthy spider plant may regain firmness quickly, while root-damaged plants can take several weeks to resume visible growth.
Escalate the inspection if yellowing continues into the center, the crown softens, roots keep deteriorating, or pests remain after treatments used according to their labels. Also reconsider multiple causes: low light and excess water often occur together, while dry conditions can increase spider-mite pressure.
If little healthy crown or root tissue remains, saving the parent plant may be less realistic than propagating unaffected plantlets. Where symptoms include unusual rings, distorted new growth, spreading wet lesions, or an unexplained rapid collapse, consult a local Extension office or horticultural professional rather than repeatedly applying fertilizer or pesticides.
Diagnose Your Yellowing Spider Plant
Compare a photo and your plant’s moisture, light, and leaf symptoms to narrow down the likely cause before making another care change.
Diagnose My Spider PlantFrequently Asked Questions
Can a yellow spider plant leaf turn green again?
Usually not. Once most chlorophyll has been lost, that leaf is unlikely to regain its original color. Use new growth and the rate of further yellowing to judge recovery rather than waiting for damaged leaves to change back.
Should I remove yellow leaves from my spider plant?
Remove fully yellow leaves with clean scissors near their base. Partly green leaves can continue supporting the plant, so they may remain unless they are soft, spotted, pest-infested, or aesthetically distracting.
Why did my spider plant turn yellow after repotting?
Temporary root disturbance can sacrifice an older leaf, but continuing yellowing may mean the new pot is oversized, the mix holds too much water, or damaged roots were buried in wet soil. Check moisture and drainage before repotting again.
Why are the spider plant babies turning yellow?
Attached plantlets may yellow if the parent is stressed or the trailing stems receive harsh sun. Newly potted babies can discolor when their small root systems dry out or remain waterlogged. Keep their mix lightly moist while roots establish, without leaving it saturated.
Does tap water cause yellow spider plant leaves?
Tap-water minerals and fluoride are more often linked with brown tips than uniform yellow leaves. If tip burn and a mineral crust appear together, try a low-mineral water source and flush the potting mix before assuming the entire yellowing problem comes from tap water.
Is a spider plant toxic to cats or dogs?
The ASPCA currently classifies Chlorophytum comosum as non-toxic to cats and dogs, but chewing plant material can still cause stomach upset or create a choking risk. Contact a veterinarian or recognized animal poison-control service if a pet develops symptoms or consumes a large amount.
Sources & Further Reading
- Spider Plant — Chlorophytum comosum North Carolina Extension Gardener Plant Toolbox
- How to Grow Spider Plants Royal Horticultural Society
- Chlorophytum comosum — Plant Finder Missouri Botanical Garden
- Diagnose Indoor Plant Problems University of Maryland Extension
- Spring Houseplant Care University of Minnesota Extension
- Toxic and Non-Toxic Plants: Spider Plant ASPCA Animal Poison Control Center